It’s not unusual to find cracks, scrapes, and gashes underneath the water level when you take your boat out at the finality of the season. The problem is whether or not the fixes demand urgent care. The simple answer is that they do, but not immediately. The draw out and release will do the most of the harm. If you’re driving a trailer, you’re well aware of how simple it is to make a mistake and end up in a collision with the trailer. Little scratches and damage might occur if you are utilizing a travel lift. In most situations, the industrial voids are the most vulnerable areas.
Dry cold air will assist dry out the affected parts in readiness for your restoration when the weather is dry following the freeze. A higher-quality restoration will be possible if the hull is dried! The stronger the link between the fix as well as the gel coat patch, the less probable this is why the gel coat patch can get contaminated. So reap the benefits of the dry, cold winter conditions and allow the affected area to dry up.
How do you fix a gelcoat on the bottom of a boat?
1. Make a Color Match

Your dealer may be able to provide a gelcoat that matches the color of your present boat. It may, however, not match owing to the corrosion of your boat. For a fit, there are packages from manufacturers like Evercoat that include colors to mix with the resin.
2. Define the edges

Smooth the surfaces to a 45-degree angle and remove any suspended debris with a rotary cutter. The base of a drilled hole may have grown raised as a result of an outdated fastener’s outward force. With a drill motor as well as a countersink blade or rotary file, gradually grind away the inflated perimeter. Tidy up with acetone after scraping away excess old sealer.
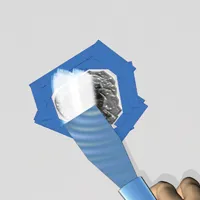
3. Remove the Tape

Utilizing 3M Painter’s Tape No. 2090 ScotchBlue Multi-Surface that’s two-inch-wide, gently masks around the margins of the composite boat restoration area. Around the gouge, scratch, or hole, leave a 16 inch uncovered margin. Protect any surrounding places or goods from mistakenly applied gelcoat or incorrect sanding by masking them off. Using acetone, wash up the area where the repair was done.
4. Toss in the Gelcoat
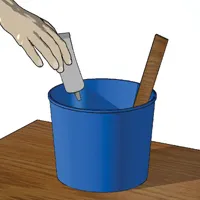
Add catalyst once you’ve color-matched the volume of gelcoat required for the restoration. Because various gelcoat varnishes demand various catalysts, be sure you’re using the appropriate two-part ratio and the right composition. With a whisk stick, fully combine the two components to make sure the entire batch cures at the very same time.
5. Apply a topcoat
Distribute the gelcoat evenly over the gelcoat patch with a tiny plastic or wood putty knife. After incorporating the accelerator, you ought to be able to work for around 10 up to 15 minutes before it begins to solidify and become non-fluid. To enable for polishing, fill the patch somewhat greater than the outer surface. Make it level with the outer medium if you don’t intend to sand it. Paint it with a hardener made of PVA in either case.
Can you apply a second coat of gelcoat?
Putting on a gelcoat may be a daunting task for several “do-it-yourselfers.” It isn’t as easy to work with as painting, and it can be challenging to get your way through. A gelcoat that’s newly applied that refuses to firm and cure is among the most difficult issues to deal with. This is frequently due to poor surface treatment or too much activator when a person has an issue with gelcoat not drying correctly.
Because you’ll be applying a second layer of gelcoat after the first, you don’t need to use the wax. Don’t forget to include the wax ingredient while creating the gelcoat for the coating process.
Is gelcoat filler waterproof?
For exterior repairs, gelcoat fill is just a white, weatherproof gelcoat filler. It can be painted, mixed, applied, shaped, and sanded with ease. Can be coated with any nautical paint that is suitable for marine use. It may be utilized on gelcoat or glass-fiber which can be used with glass-fiber Matting for renovation to GRP. Even if the gelcoat has been damaged but has faded, it is not as watertight as a glossy surface. The longer the gelcoat is left to corrode and discolor, the worse water-resistant it becomes—until it becomes flaky and cracked, requiring a costly painting job.
Can you spray a clear coat over a gelcoat?
Without preparation, you could be ready to access the clear coat directly over the gel coat. If experts were you, though, they would definitely sand the panels using a fine grit sheet and afterwards wipe them out using isopropyl alcohol. You may also use the same solution that comes with the Imron gloss finish to clean things up.