Apple Silicon is a package of current processors running on most macOS devices and relies on ARM architecture. Some recent versions of the Apple Silicon cannot run OBS and select programs directly.
OBS works on Apple Silicon devices either through direct installation or through Rosetta 2. Older macOS versions may not smoothly run OBS without the Rosetta add-on.
Getting OBS to run on Apple Silicon isn’t tricky, especially when you can access the correct information. That’s why this article provides vital information to help you run OBS on Apple Silicon with ease.
Does OBS Work on Apple?
OBS supports several versions of its recording and streaming software on macOS-enabled devices. Most Apple desktop PCs and laptops support different OBS releases with compatible updates.
OBS is compatible with Apple devices running the Silicon build. Currently, two methods exist to install and run OBS on Apple Silicon.
How to Use OBS on Apple MacBook M1
Step 1: Launch OBS
Open OBS from your Mac and make sure it’s updated to the latest version.
Step 2: Configure settings and save
Follow the Auto-configuration Wizard instructions to set up your OBS app.
Step 3: Create Scenes and Sources
OBS allows users to create scenes and sources to capture different devices.
How to Make OBS Run Faster on Apple
A. By reducing output parameters for streams or recordings
Step 1: Launch OBS
Open the OBS client app installed on your macOS device. It’s a smart choice to update your OBS software to the latest version before running any speed-enhancement settings.
Step 2: Go to Settings
Next, go to File from OBS’ menu bar. After that, click on Settings from the list of options available. Clicking on Settings opens a pop-up window with several customization tabs to tweak streams and offline recordings.
Step 3: Select Output
Click on Output from the list of customization tabs. Two sections are in this tab: Streaming and Recording. Reducing and changing some elements in these settings will make OBS recordings run faster.
Step 4: Reduce relevant output parameters and click OK
Under the Streaming section, reduce the video bitrate manually or with the directional keys.
You can also reduce the audio bitrate and switch encoders to an option that uses fewer CPU resources.
Next, change the recording quality and recording format, and disable replay buffers.
Note that these settings will make OBS run faster but will render low-quality videos on streams and offline recordings. Investing in a high-performance desktop PC could be the best choice to make OBS stream quality videos while running smoothly.
B. By running sole sources during streams or offline recordings
Step 1: Launch OBS
Update your OBS to the latest version and launch it from your macOS device.
Step 2: Go to Sources
After opening the OBS client app, proceed to the Sources menu at your window’s bottom left corner.
Step 3: Click on ‘–’
Clicking on the minus button on the OBS Sources tab redirects you to a pop-up window.
The window will display a confirmation question like “Are you sure you wish to remove ‘Display Capture’?”
Step 4: Click ‘Yes’ on the pop-up window
Clicking Yes on the pop-up menu removes any source you currently don’t need from OBS. Reducing the number of parallel-running sources eases the strain on your hardware which enables faster streams.
How to Update OBS on Apple Mac
A. Through direct downloads
Step 1: Visit the OBS Studio homepage
Visit the OBS homepage on obsproject.com. Next, proceed to choose the preferred download link from the options available.

Step 2: Locate the macOS download link
The latest OBS release for macOS devices is usually in the middle of download links of Windows and Linux-enabled devices.
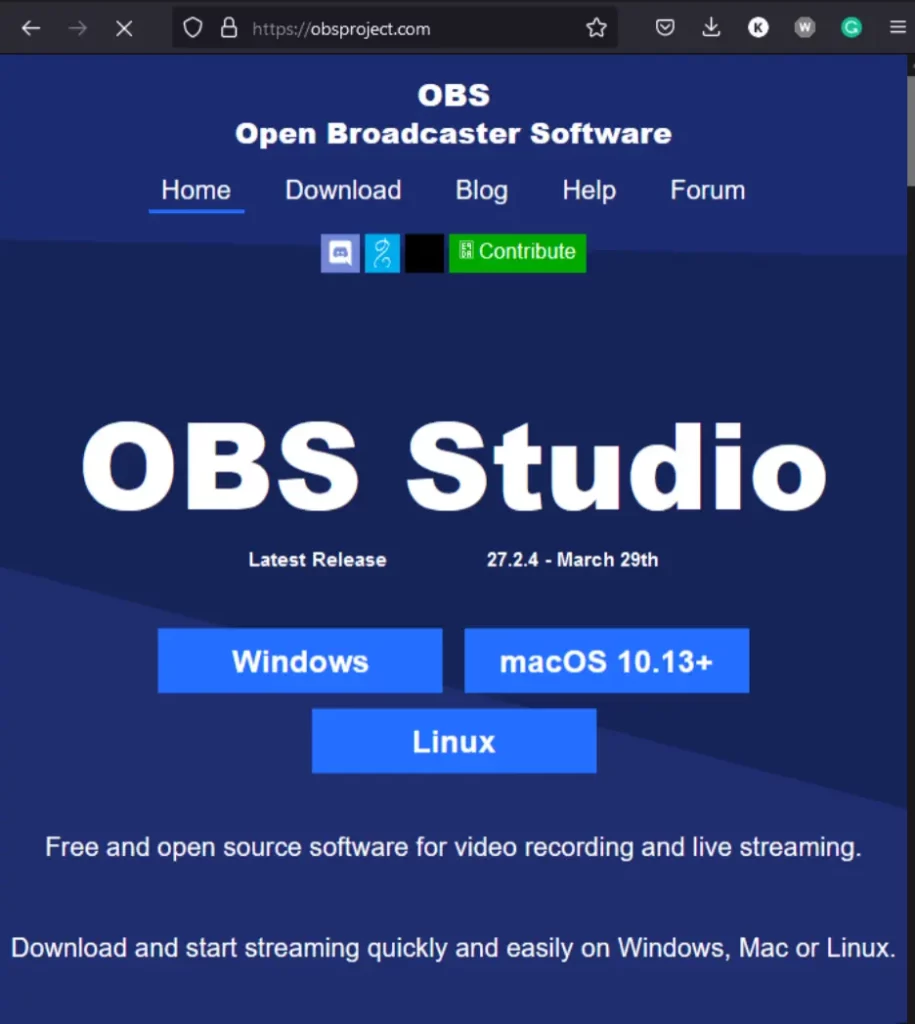
Step 3: Download OBS for macOS and install
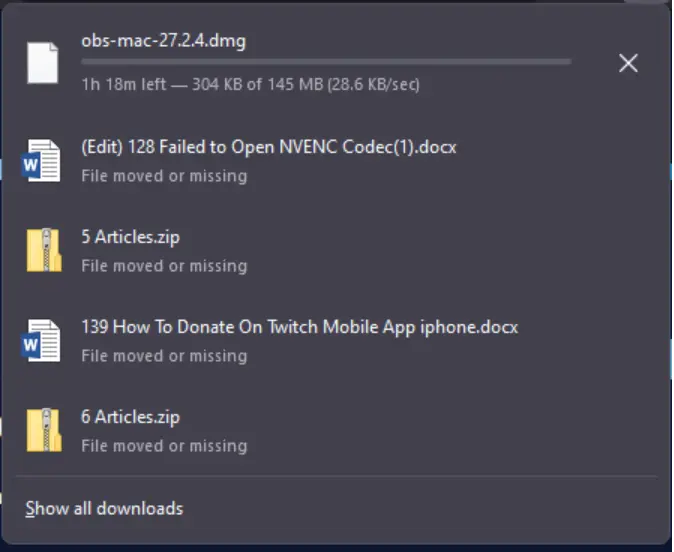
Click on the link to begin downloading OBS for macOS devices onto your computer. Wait for the download package to complete before running it to begin installation.
The duration for OBS installation to complete depends on your macOS, RAM provisions, and space available.
After downloading OBS, run it on your system to be sure it works. New fixes and updates may cause some issues on some Macs, especially those running old builds.
B. Through OBS updates
Step 1: Launch OBS
Run the OBS client app installed on your Mac. It’s better to turn off all apps you won’t need while streaming before running OBS.
Step 2: Go to Help
After OBS opens, click on the Help button at the menu bar.
Step 3: Click ‘Check for Updates’ or ‘Visit Website’
Next, click on Check for Updates if you want the OBS client app to search for new releases to its software. You can also select Visit Website from the list of options to download the latest OBS for your macOS device.
Step 4: Allow OBS to make changes
Let OBS complete installing updates and making all necessary changes after clicking ‘Update Now’.