If you have bought any of Ubiquiti’s wireless networking devices and frequently check their working status on the UniFi dashboard, you might encounter some (or a lot of) alerts, indicating that there is “High TCP Latency” between your Ubiquiti device and your own.
To fix this issue, you will have to change some of your device settings and also try to change the firmware of your devices. Some of these settings may have set by default by the application, thus, you have to change them. Some firmware versions have also been noted to be causing this issue. Read on to know how to fix this issue!
What is High TCP Latency for Clients
If you have the UniFi Network application on any device, you can see on the Anomalies tab that some of your clients, or the devices connected to your UniFi AP may have the “High TCP Latency” issue.
Generally speaking, you don’t want any form of high latency in your connections, as this often translates to poor connections that may even lead to signal drops in your devices. This can be frustrating for end users so it’s imperative that you fix this problem.
Fix High TCP Latency by Changing Settings
To fix the “High TCP Latency” issues on your devices, you will have to change some of your configurations. Change the following settings:
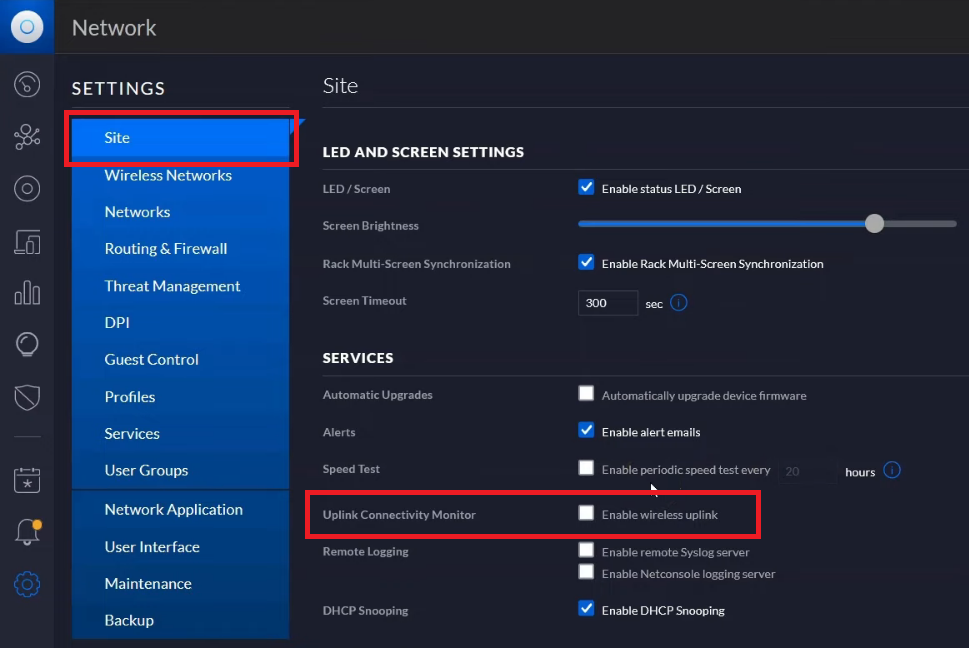
- Disable Uplink Connectivity Monitor. You can find this by going to Classic Settings > Site > Services > Uplink Connectivity Monitor then unchecking “Enable wireless uplink.”
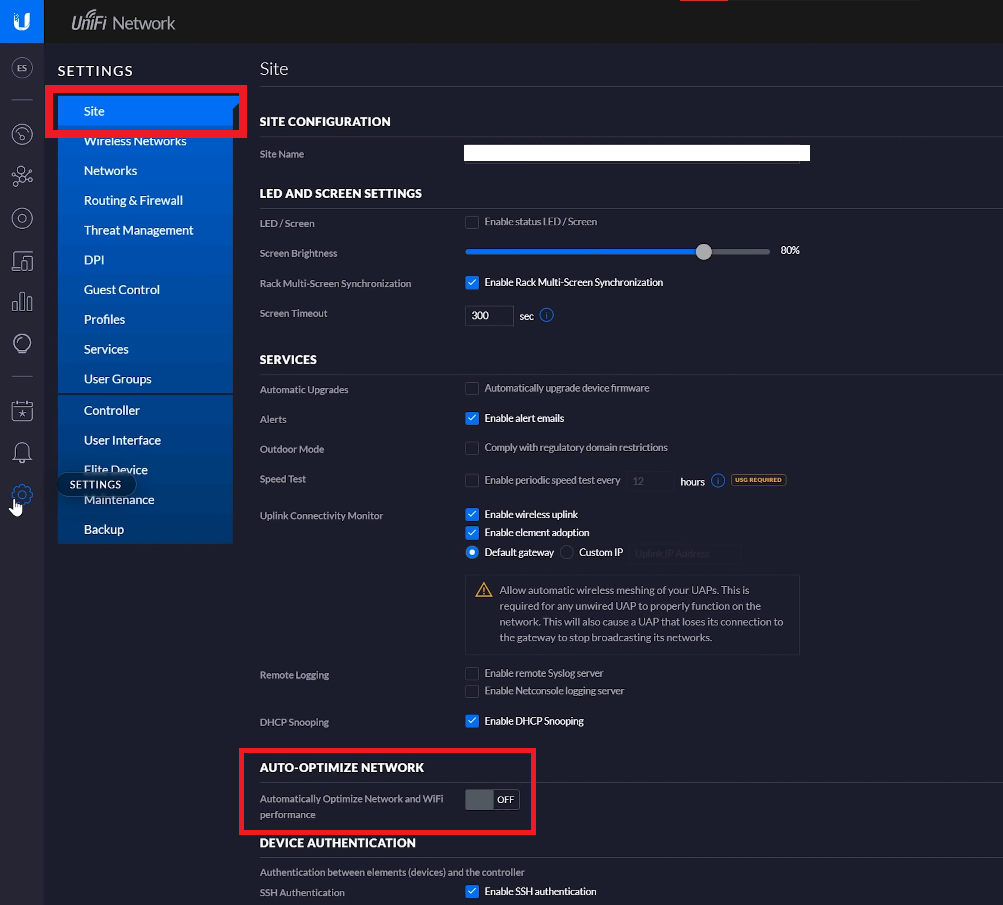
2. Disable Auto-Optimize Network. You can find this in Classic Settings > Site > Auto-Optimize Network.
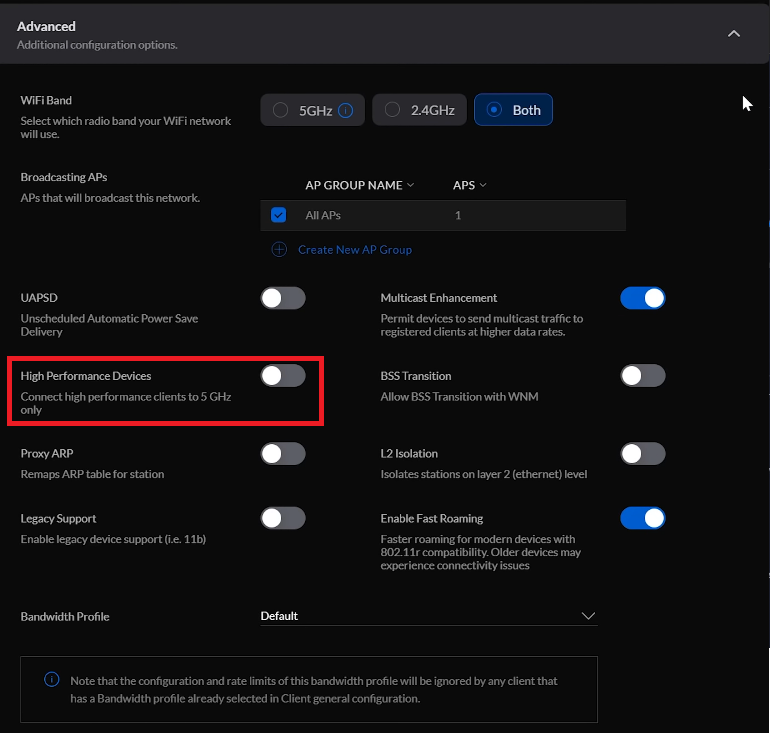
3. Disable High-Performance Devices. You can find this in:
- Classic Settings > Wireless Networks > SSID > Advanced Options > High Performance Devices
- Settings > Wifi > (three dots on the network) > Edit > Advanced
4. Disable Band Steering. You can find this in Devices > UAP > Config > Band Steering.
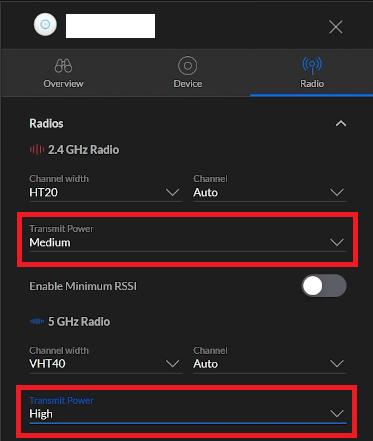
5. Navigate to your radios in:
- Devices > UAP > Config > Radios
- Unifi Devices > Device > Radio tab on the sidebar
Change the Power in your 2.4 GHz network to Low/Medium and the Power in your 5 GHz network to Medium/High
Fix High TCP Latency with Firmware Downgrade
Many people have commented that on some versions of the UniFi AP firmware, the “High TCP Latency” anomalies might actually be false positives and do not affect the actual performance of your connection.
If the devices connected to your UniFi AP have no issues with their connections, then it’s highly likely that your UniFi device’s firmware is reporting false “High TCP Latency” issues. We recommend that you change your device’s firmware, either to a later version (if your current firmware is outdated) or an older version that is known to not have those issues.
There are two ways that we recommend for you to use to change the firmware of your UniFi device: thru SSH or the custom firmware upgrade.
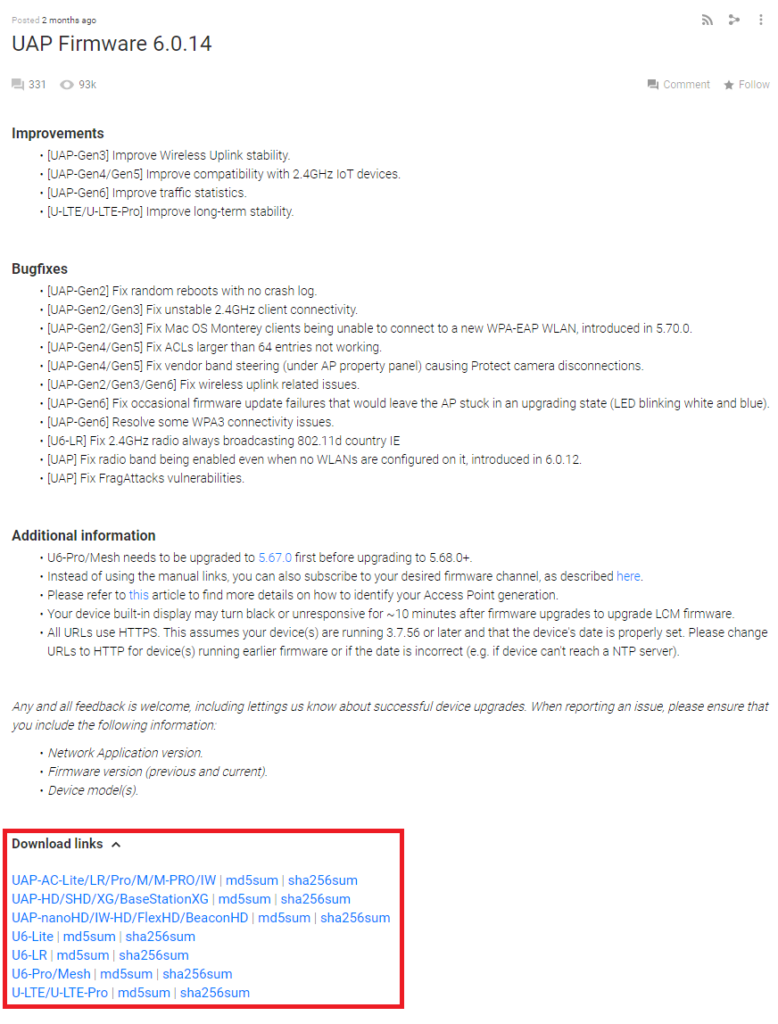
Before starting the firmware downgrade, you need to identify your current firmware version and the version that you want to downgrade to. You might want to check the forums for the specific versions that are known to be working well.
If you’re not sure which version to choose, pick the latest release first (if your version is outdated), or the previous version of the firmware. The releases can be found in the Ubiquiti Community website, under Releases.
Firmware version files are in the BIN format, and the download links can be found in the Download Links part of the version post. Make sure to choose the first link, not the md5sum or sha256sum.
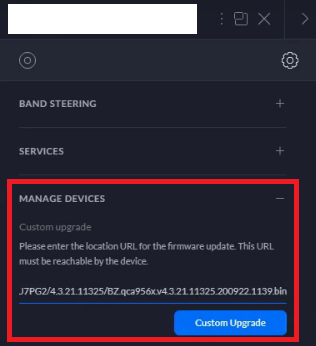
To change the firmware of your device using the custom firmware upgrade:
- After finding the download link of the firmware for your device model, right-click on it, then select Copy Link Address.
- In the Network application, go to the device you want to be changed then go to Device > Manage > Custom Upgrade
- In the textbox “Location URL,” paste the link then click Apply Custom Upgrade.
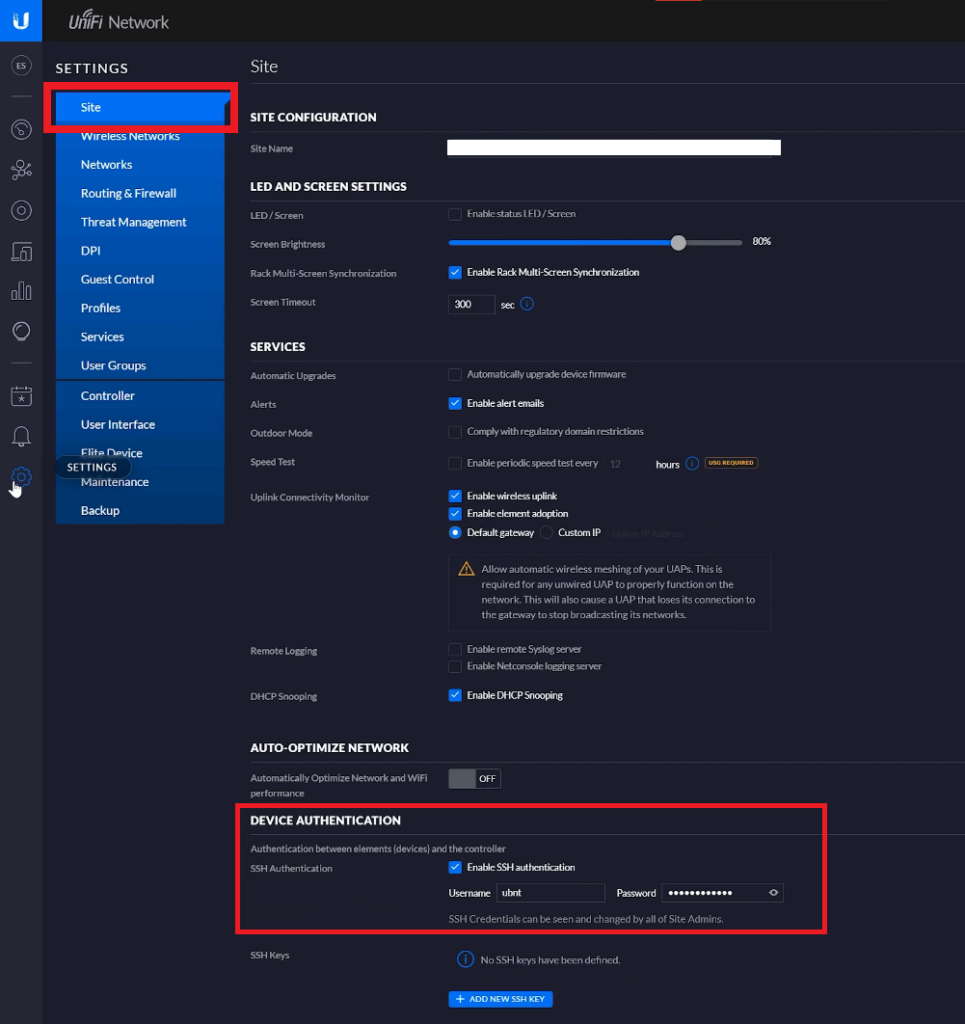
To change the firmware of your device using SSH, you first must have Device SSH Authentication. To do this:
- Open the Network application.
- Navigate to Settings > System > Application Configuration > Device SSH Authentication or Settings > Site > Device SSH Authentication
- Make sure that Enable SSH authentication is checked.
- You can view your SSH credentials in this part, too. If you have not set up or changed your credentials, there are three possible default values of username / password
- root / ubnt
- ubnt / ubnt
- root / your SSO account’s password (account.ui.com)
If you have access to your SSH credentials, do the following:
- After finding the download link of the firmware for your device model, click on it to download it. Find the location of the firmware file and keep it.
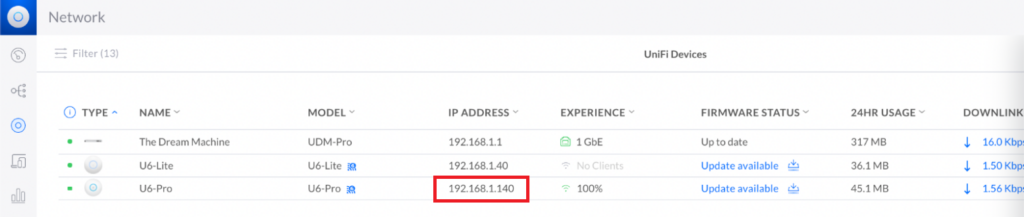
- Find the IP address of the device that you want to be changed. You can see this in Devices. The IP address is the string of 4 numbers separated by dots, often starting with 192.168.
3. On any macOS or Linux Terminal or Windows PowerShell on a Windows machine with PuTTY installed, use the scp command to transfer the firmware file to the device.
The format for the command is as follows:
scp </location path/firmwarefile.bin> <user>@<IP of device>:/tmp/fwupdate.bin
- If prompted for a password, use the SSH password.
- When the scp command is finished, SSH into the AP device by typing the following command to the terminal:
ssh <user>@<IP of device>
- Type the following command:
syswrapper.sh upgrade2 &
UniFi DNS Timeout
Another similar issue, DNS timeouts, can also be fixed by performing a firmware change. You can follow the same steps described above if you are also getting these issues.