Getting a clean sound with minimal background noise could be difficult without running a Voicemeeter noise gate on your system. The Voicemeeter noise gate will support better sounds without crackling, hissing, and other unwanted sound interference in your audio feed.
The Voicemeeter noise gate is a function designed to reduce background noise and other disturbances from live or recorded sound. Combining the right microphone and settings on Voicemeeter is usually enough to produce clear sounds from your audio interface.
But it could be difficult to use Voicemeeter noise gate without the right steps. That’s why this guide provides relevant details to help you use Voicemeeter’s noise gate function with zero hassles.
Table of Contents
Is There a Noise Gate in Voicemeeter?
All Voicemeeter versions support specialized VST plugins designed to create a noise gate. The gate created by plugins work through Voicemeeter to shut out any unwanted noise coming from your environment or accessories.
How to Use Noise Gate on Voicemeeter
Step 1: Google Voicemeeter
First, access the Google search engine through the default search bar on your browser. Next, type the keyword “Voicemeeter” (without quotes) and hit Send or Enter.
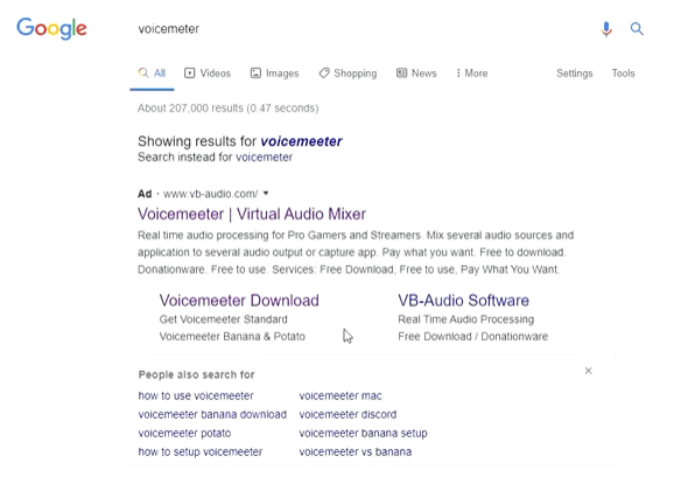
From the search results, click on the website with address www.vb-audio.com.
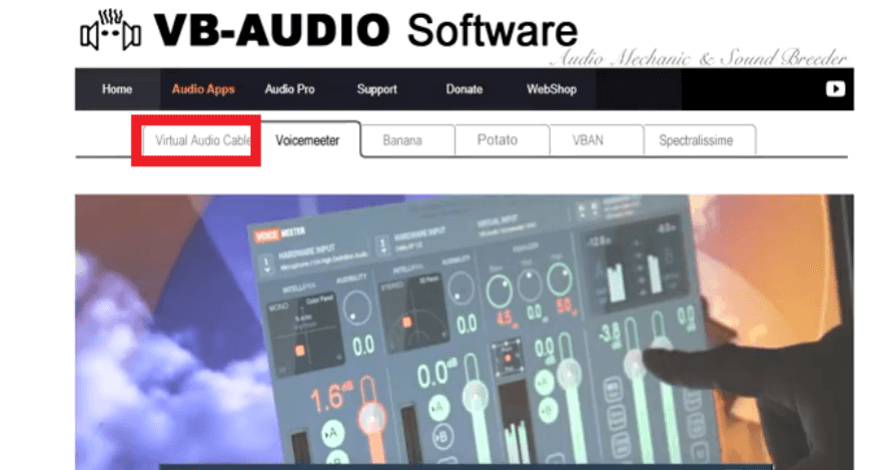
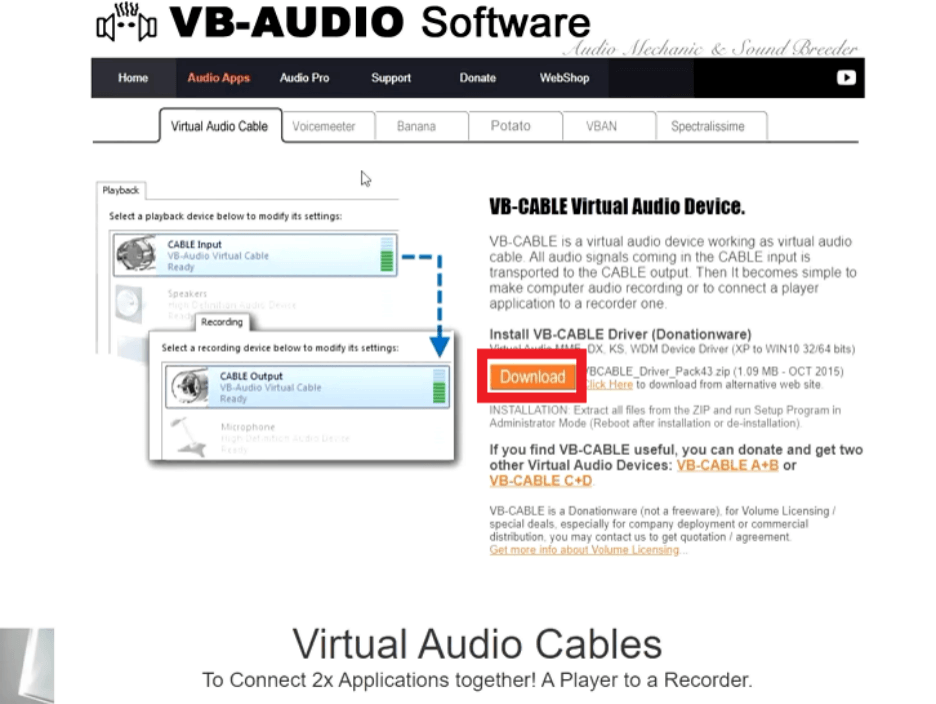
Step 2: Download VB-CABLE Virtual Audio Device Driver
Next, download the VB-CABLE Virtual Audio Device Driver. Click on Virtual Audio Cable tab
Click Download
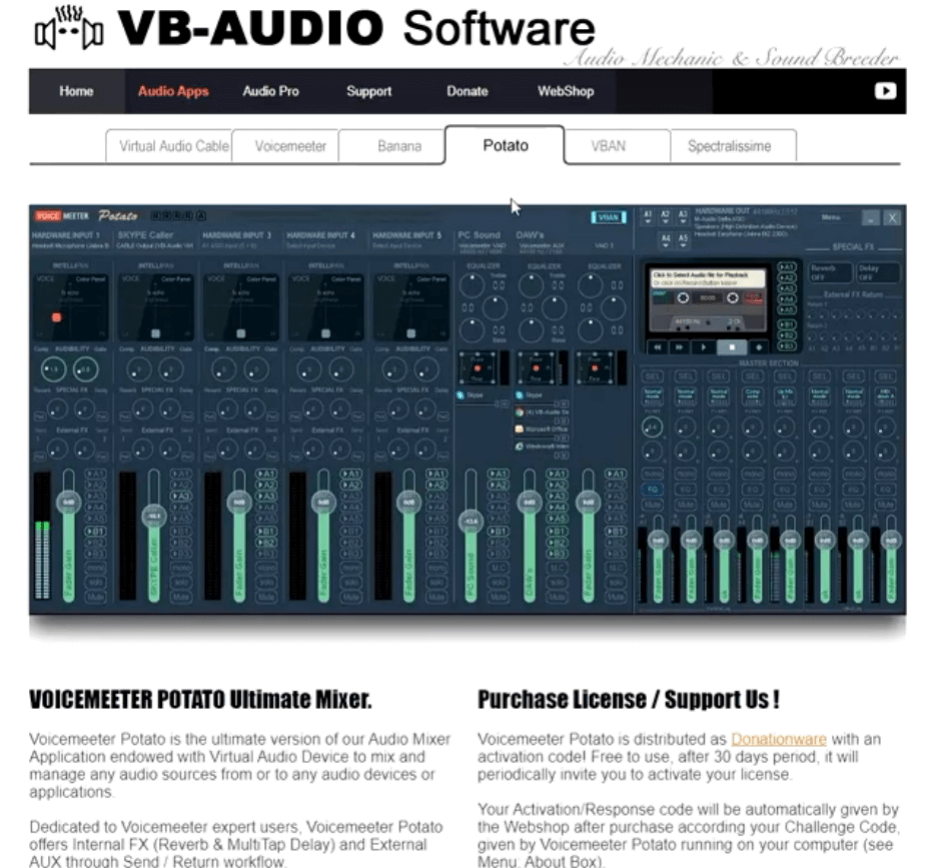
Step 3: Download Voicemeeter Banana or Potato
Download Voicemeeter Banana from its designated tab

Voicemeeter Potato is also available for download on the next tab
Step 4: Restart your computer and open Voicemeeter
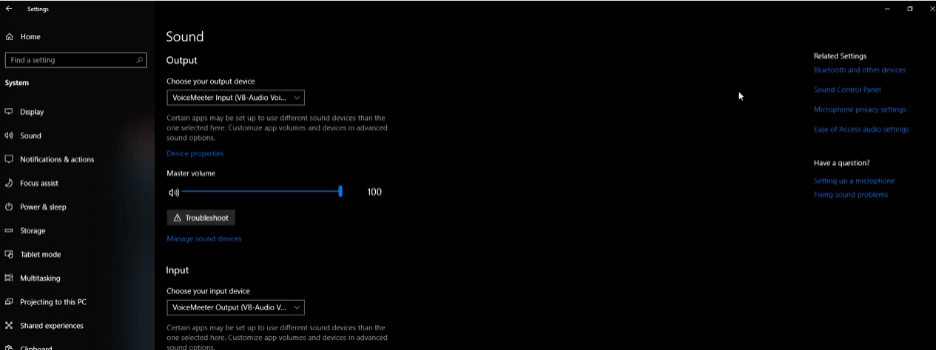
First, restart your computer and open Voicemeeter. Next, go to Sound Settings on your computer.
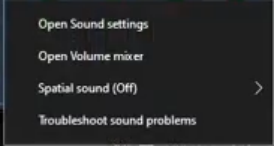
Open the Sound Control Panel
Step 5: Go to Playback Tab
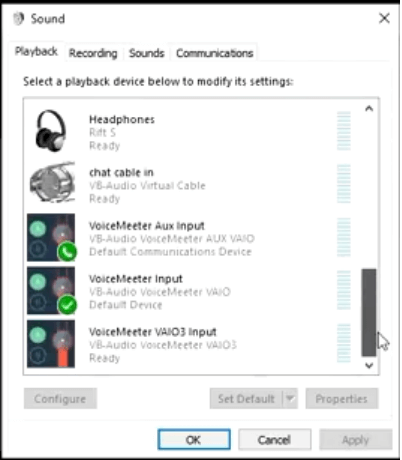
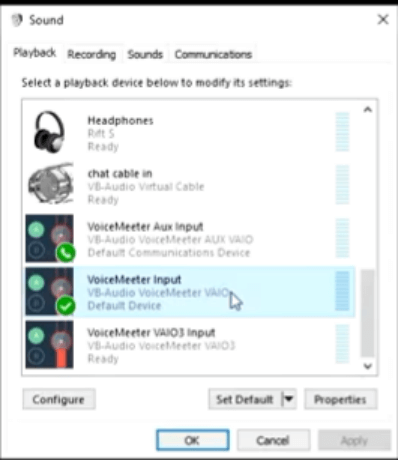
Step 6: Select Voicemeeter AUX input as Default Communication device
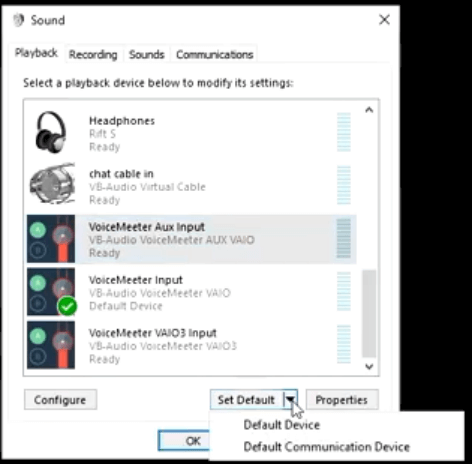
Step 7: Select Voicemeeter as Default
Step 8: Go to Recording Tab and Select Voicemeeter Output as Default Output Device
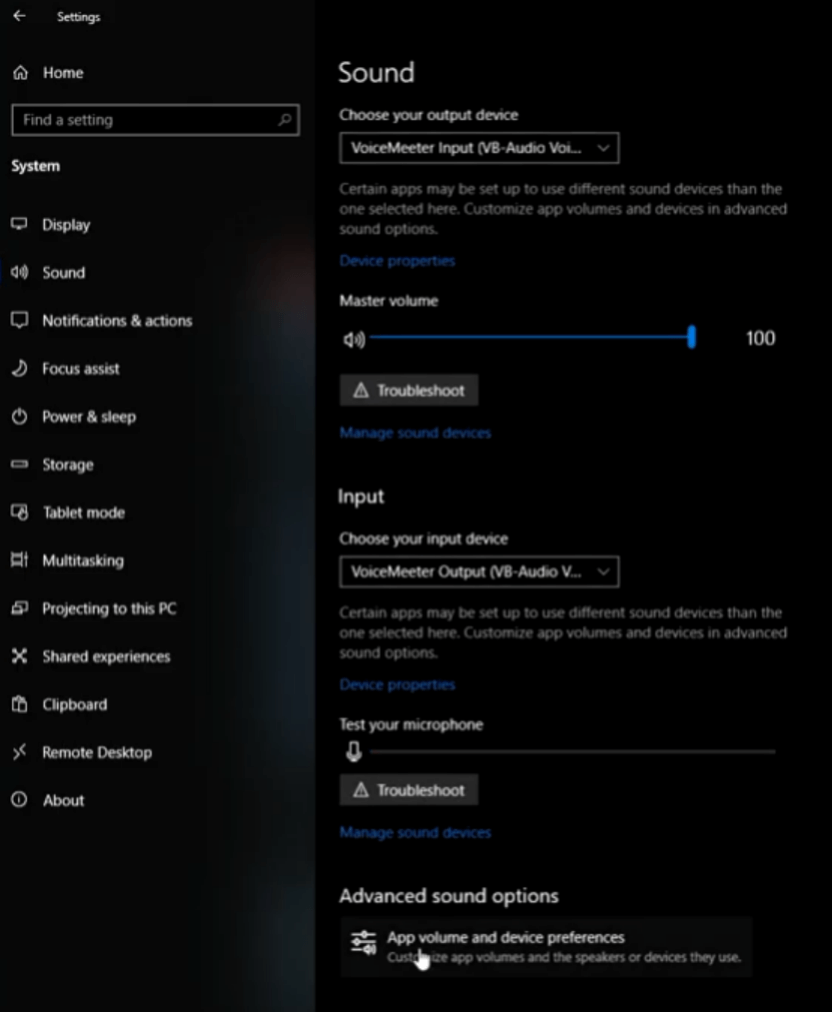
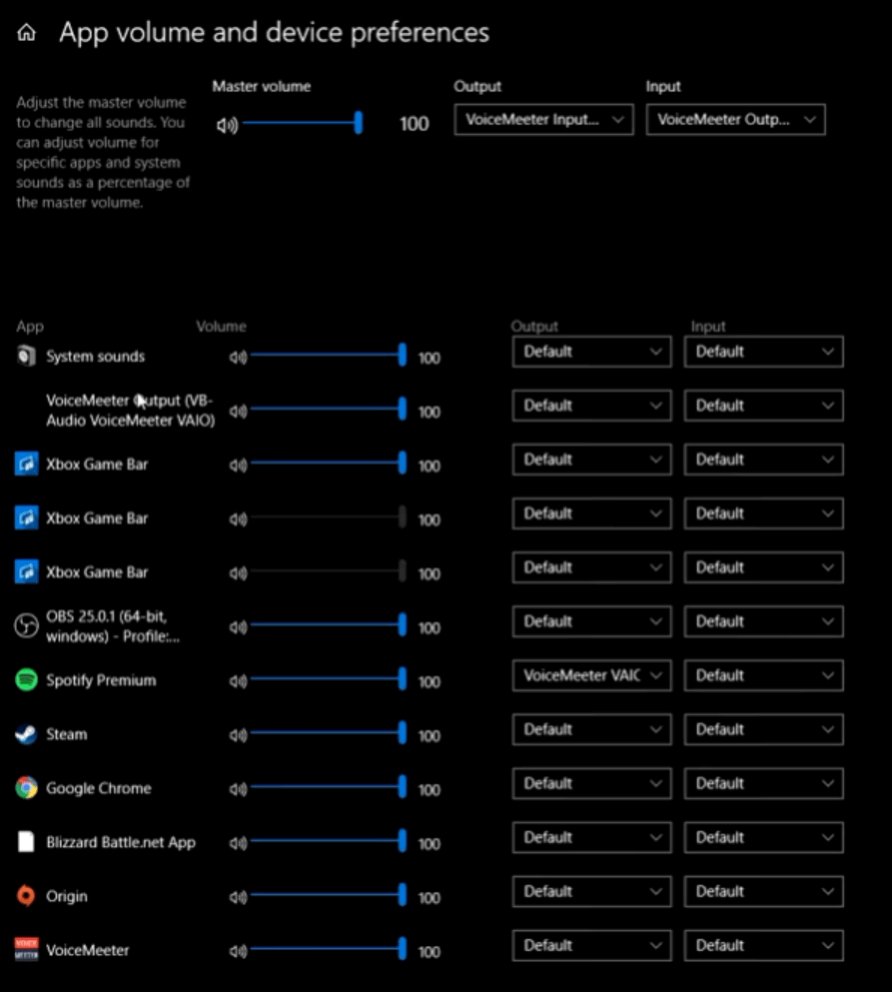
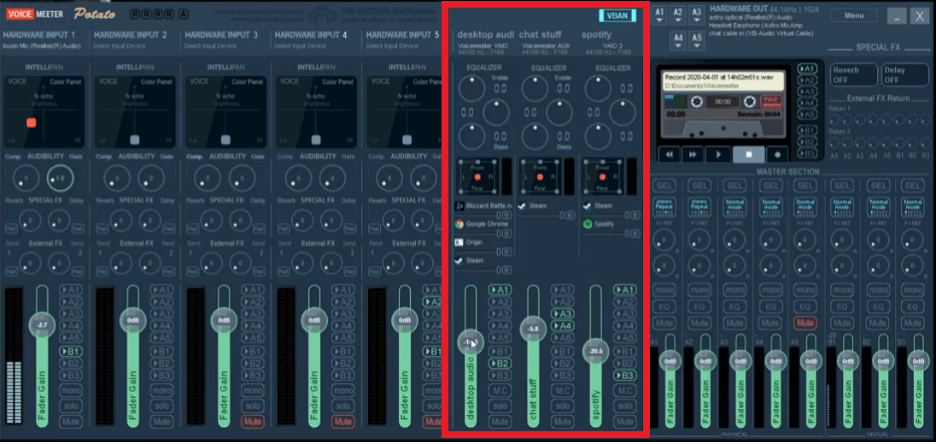
Next, go to Sound > App Volume and Device Preferences on your device. Set Voicemeeter VAIO 3 Input on your preferred streaming service.
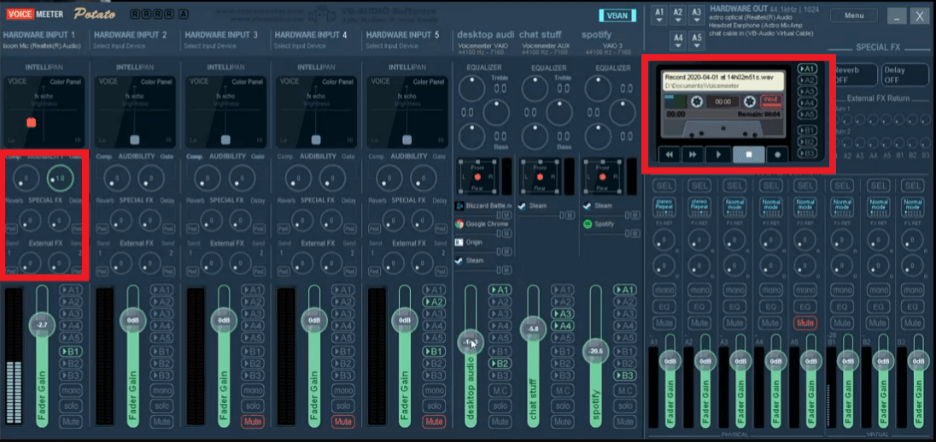
Step 9: Open Voicemeeter and set volume threshold
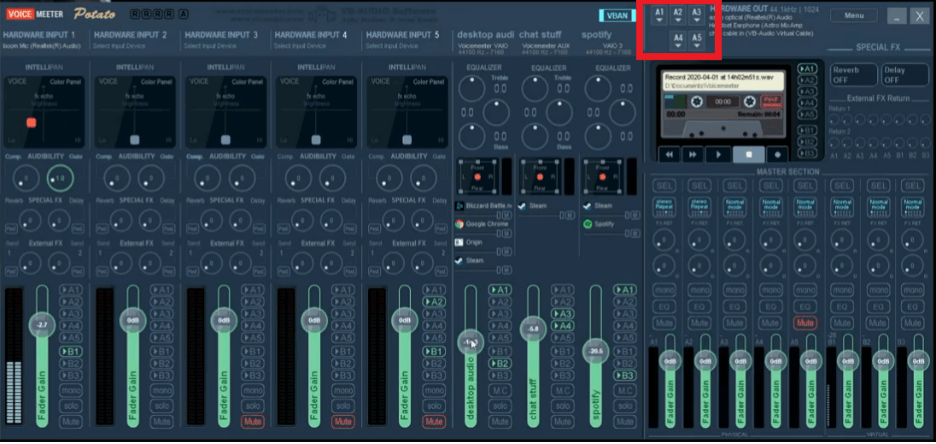
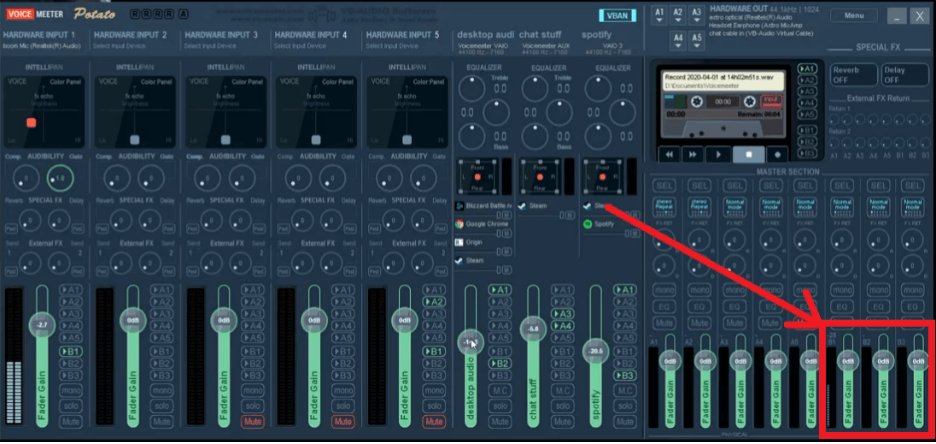
Step 10: Set hardware output devices
Step 11: Set microphone
Select Hardware input 1 > Select input device
Step 12: Route channels to virtual audio cables
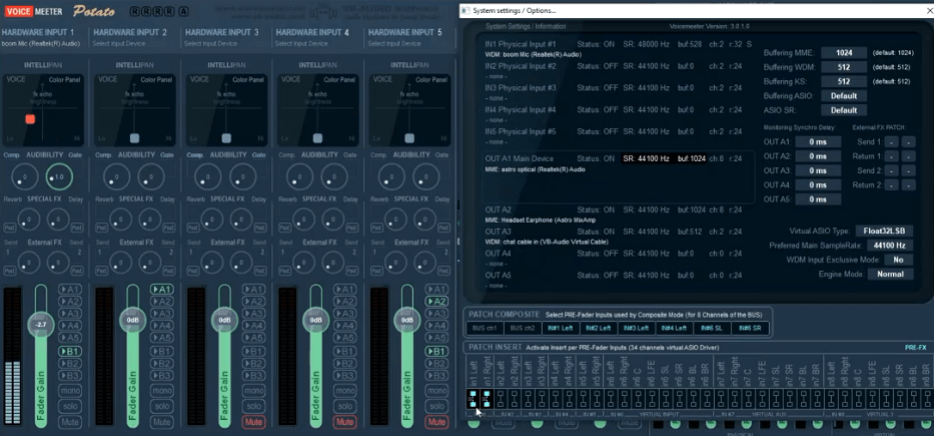
Step 13: Highlight IN 1 Left and IN 1 Right Patch Inserts
On Voicemeeter, go to Menu > System Settings and highlight IN 1 Left and IN 1 Right from available options.
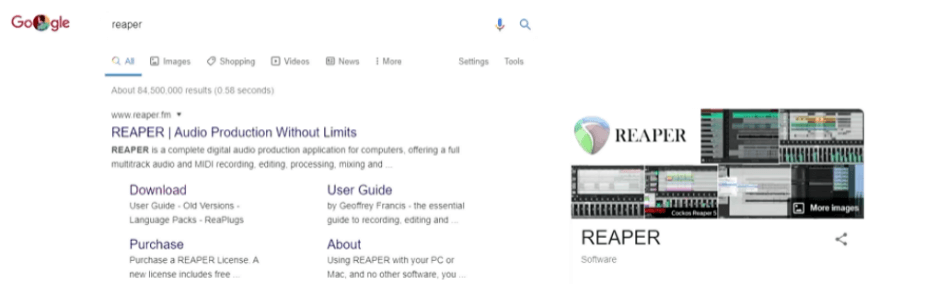
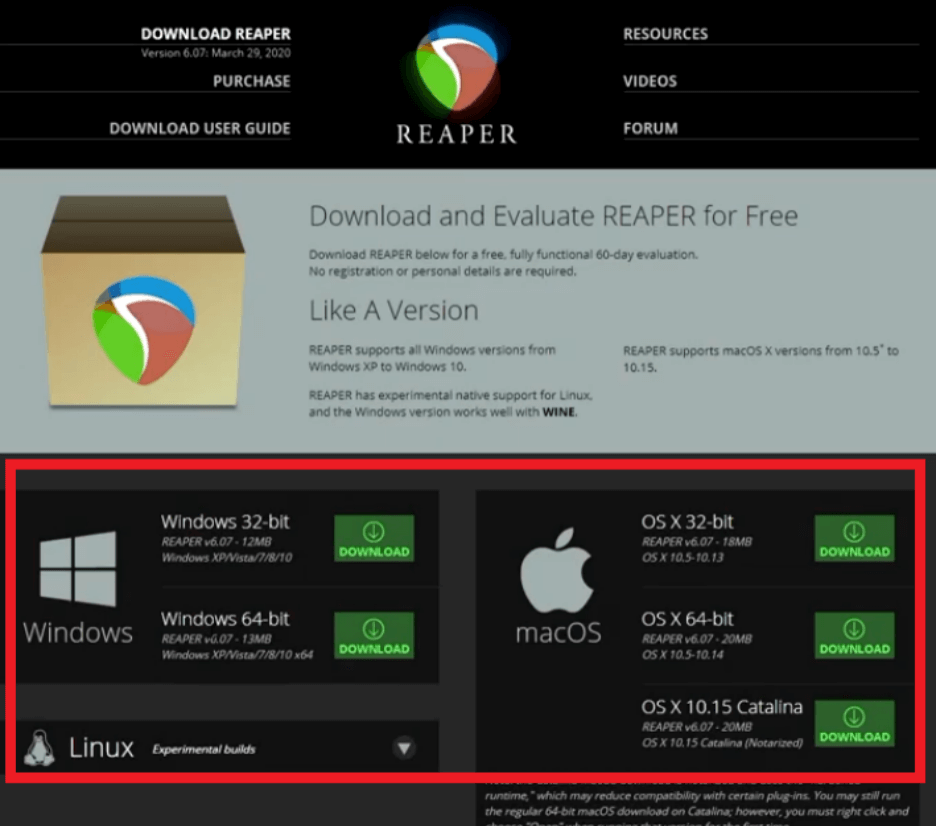
Step 14: Download Reaper plugin
Google the quoted keyword “reaper”
Download plugin for your PC’s operating system
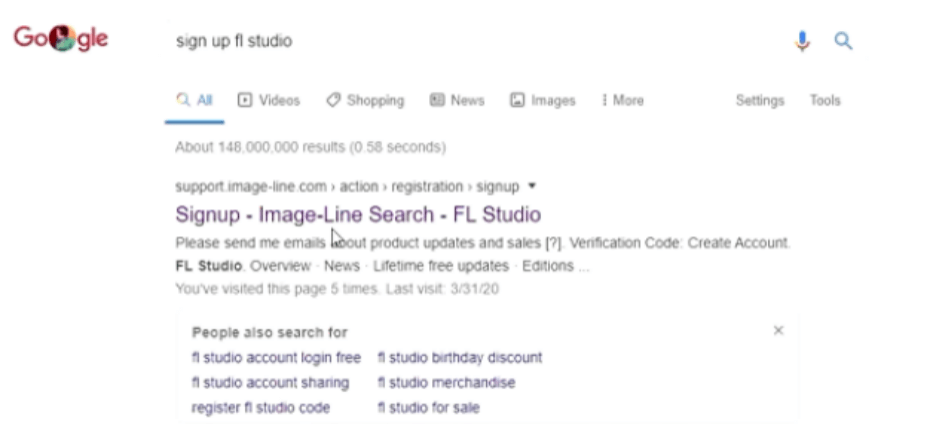
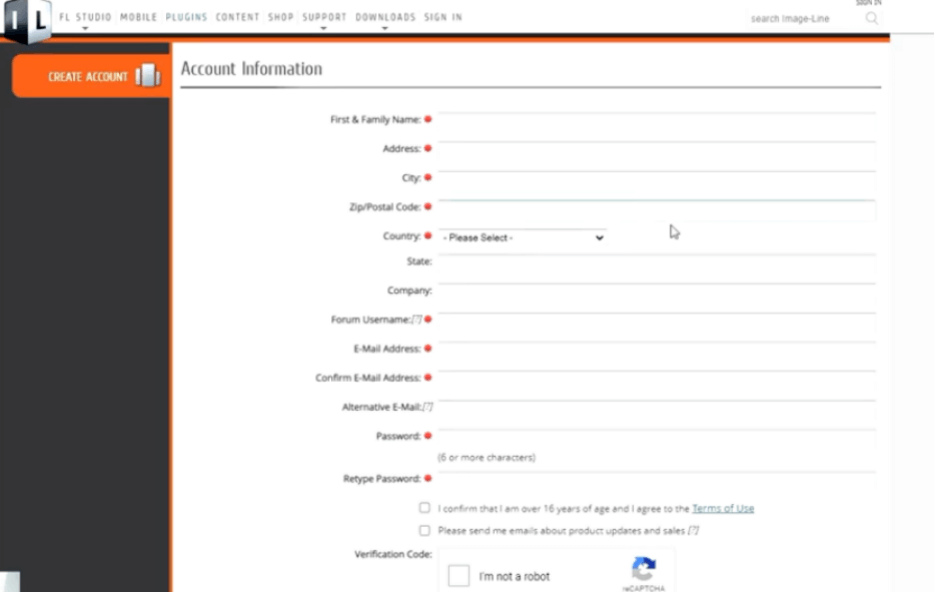
Step 15: Sign up for FL Studio
Google the keyword “sign up for FL studio”
Register an account by filling and sending correct information in boxes provided
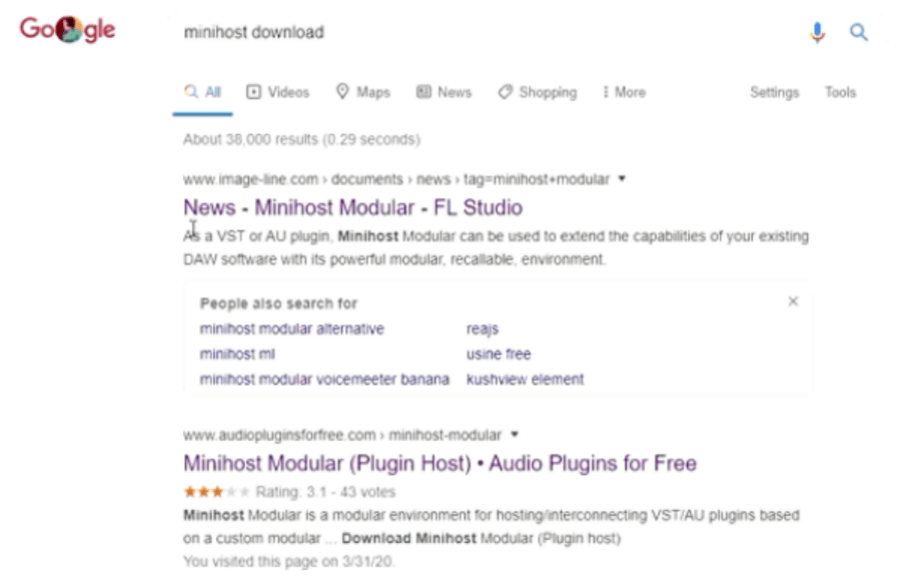
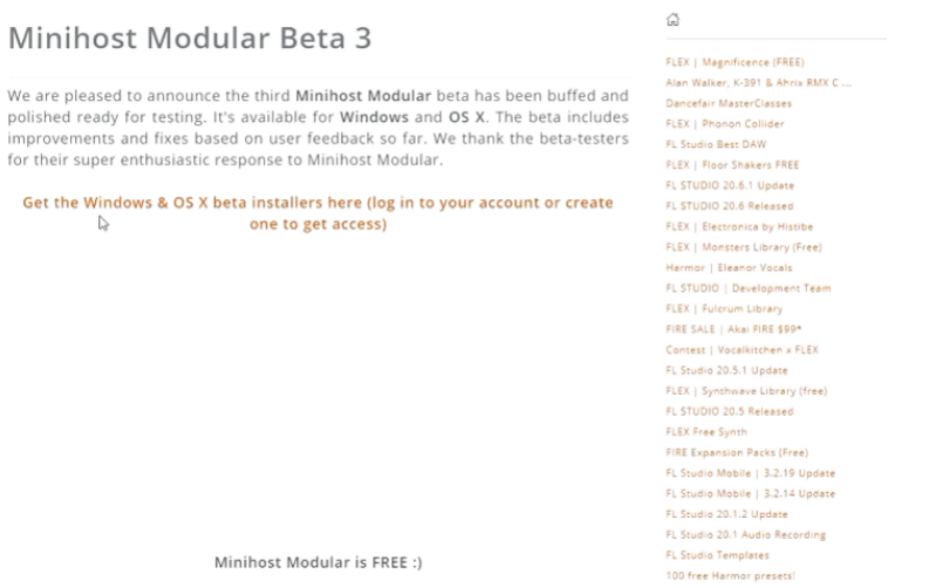
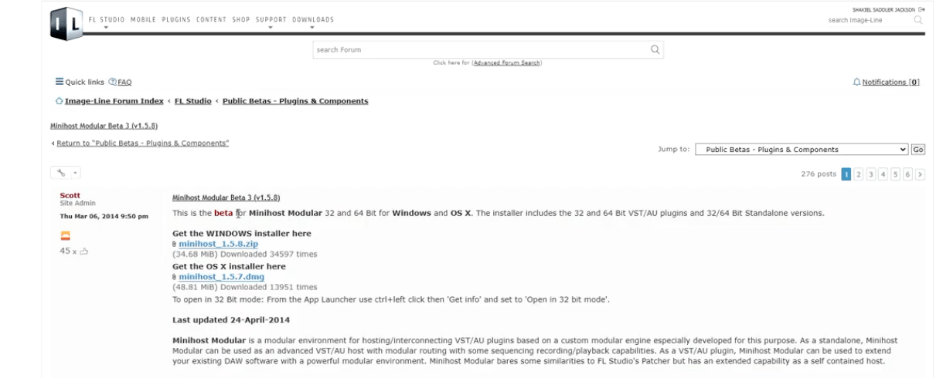
Step 16: Download Minihost Modular
Google the keyword “Minihost modular” or “minihost download”
Trying to download Minihost Modular without registering an FL studio account won’t work. Signing up for an FL studio account will make download links for Minihost Modular available.
Step 17: Open Minihost Modular
Step 18: Set up Minihost Modular
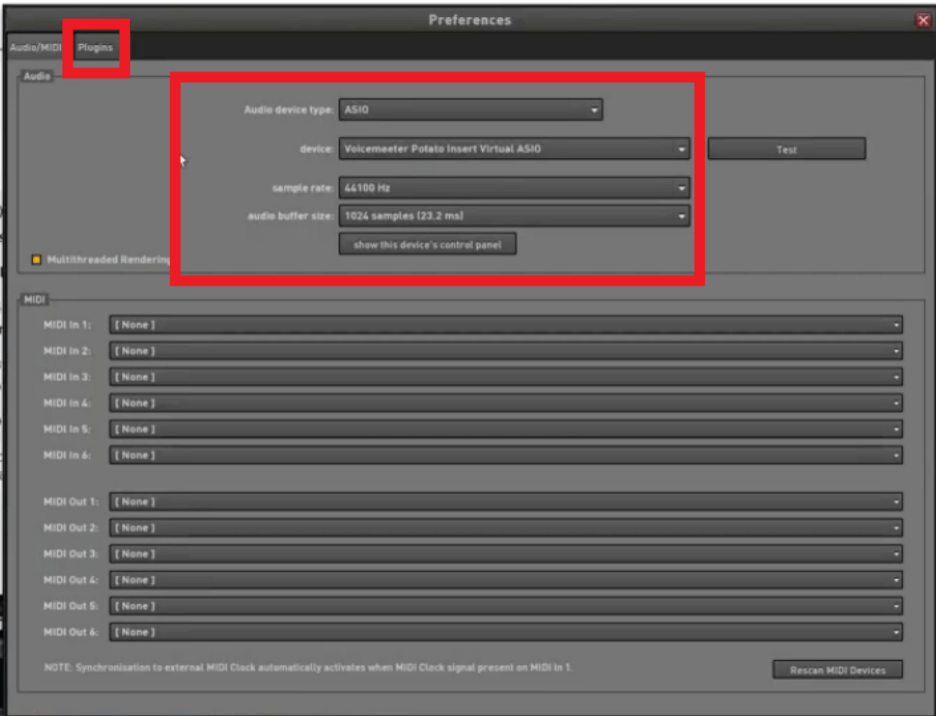
First, click File > Preferences.
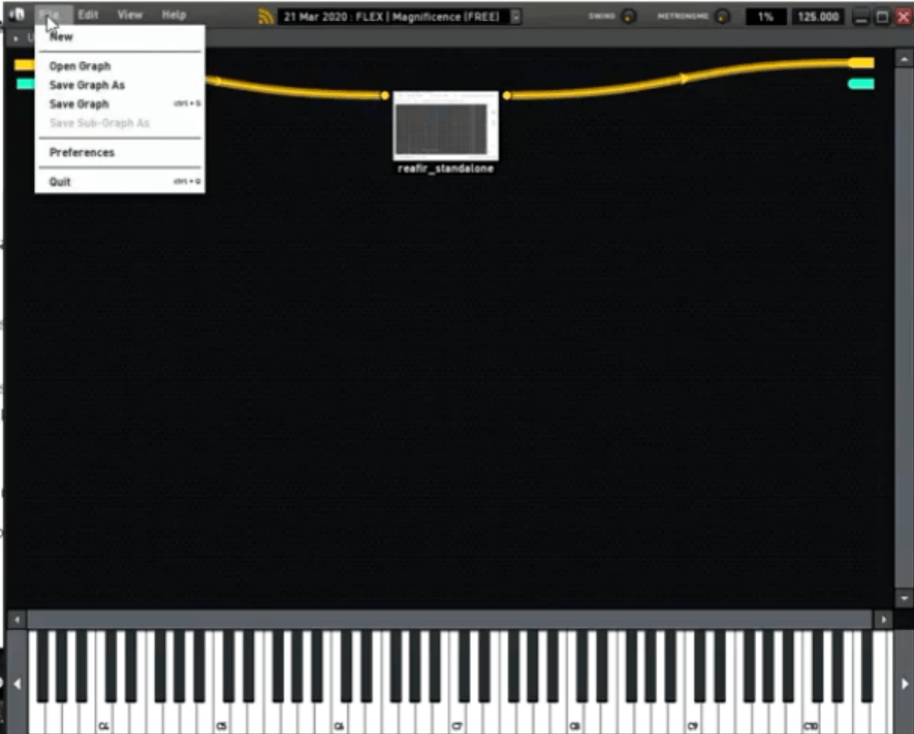
Next, choose audio device type, device, sample rate, audio buffer size, and other relevant settings.
After selecting the correct settings, click Plugins and then Browse. For Windows, go to Local Disk > Program Files > VST Plugins and click OK.
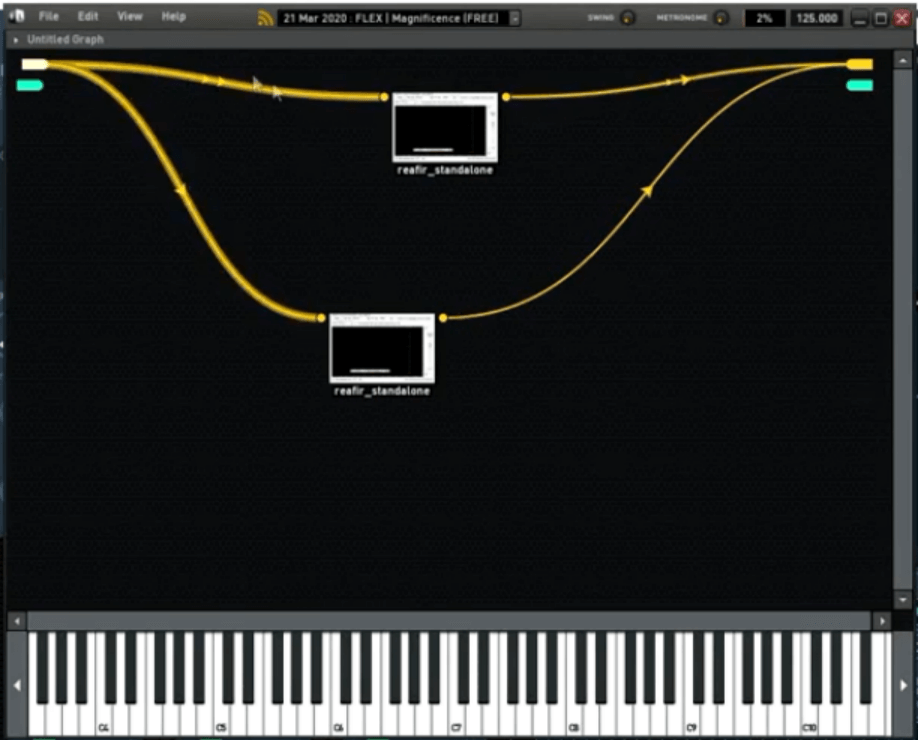
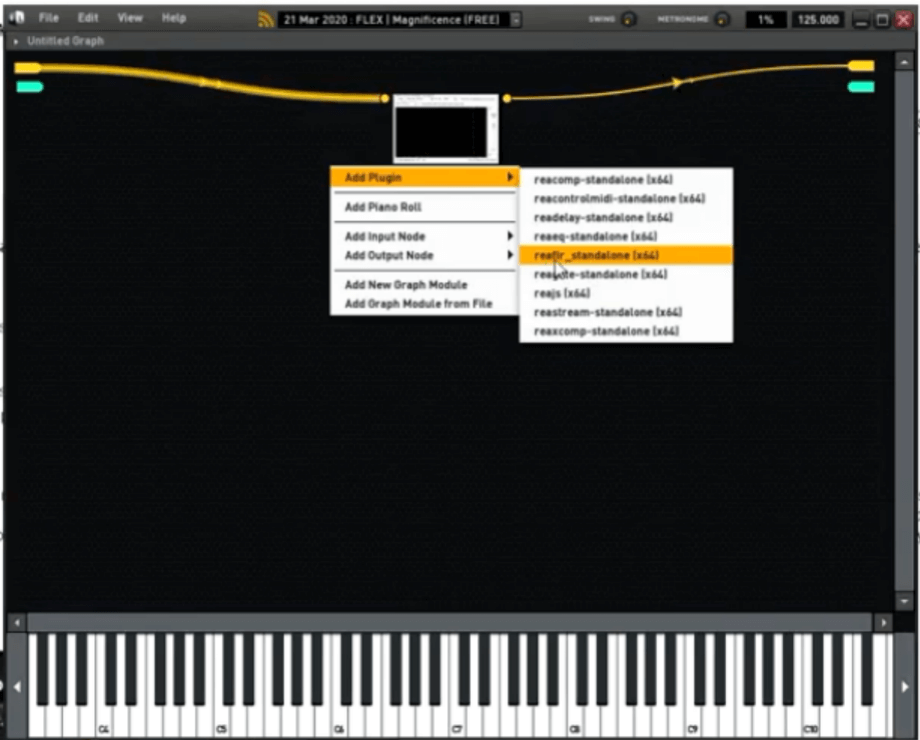
Next, right-click a blank area around Minihost Modular and select Add plugins from the list of available options.

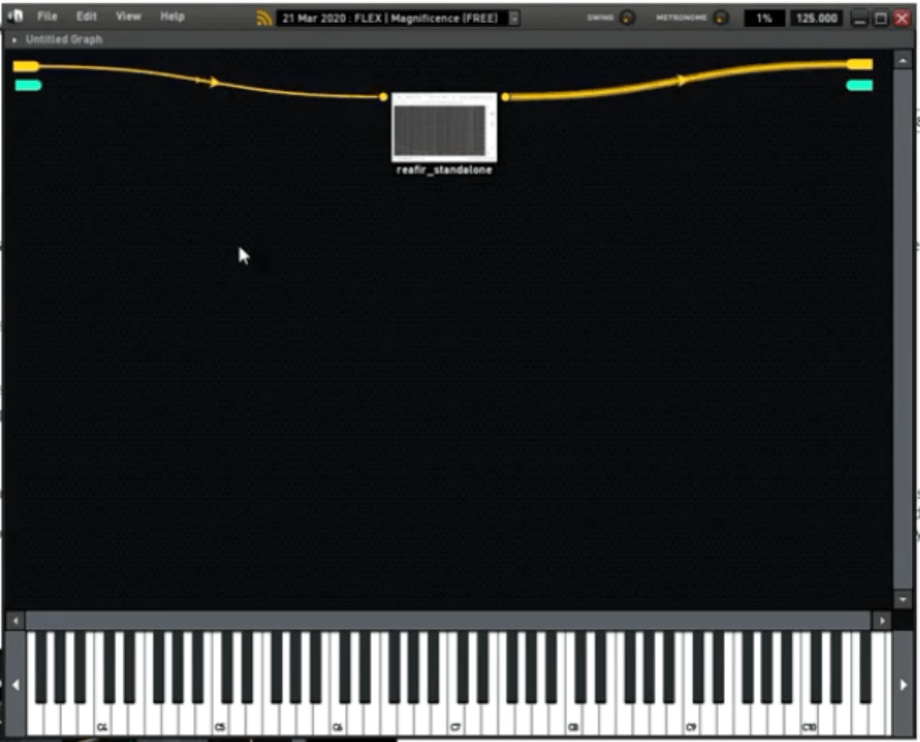
Select realfir_standalone (x64 or x86) as your preferred plugin. Drag input from input point A to new plugin box insert.
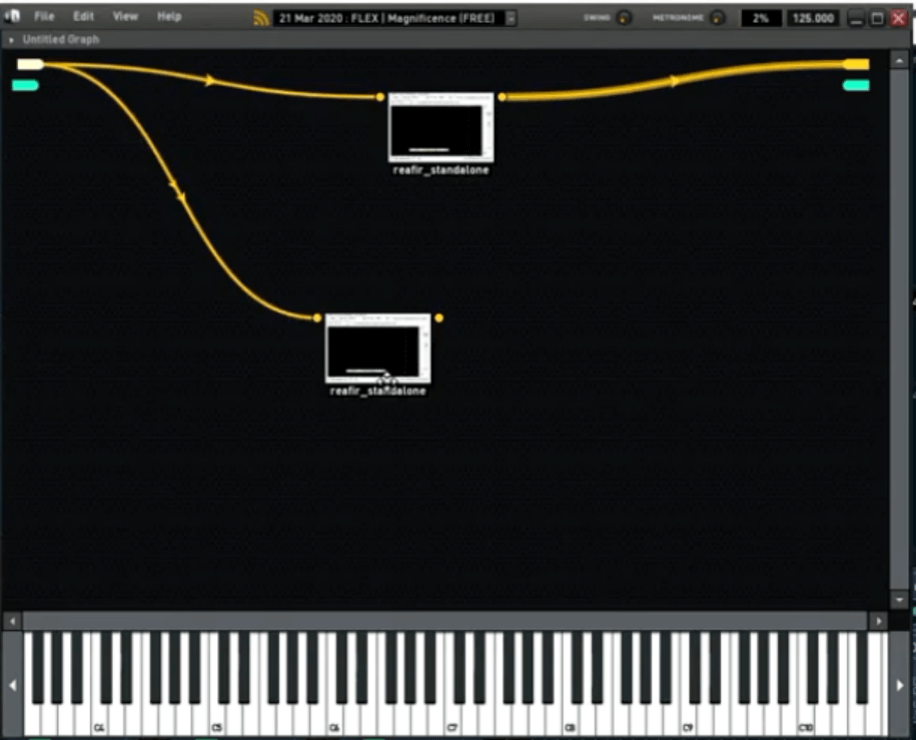
Next, drag an output link from the new plugin to your device’s output
How to Set a Noise Limiter on Voicemeeter
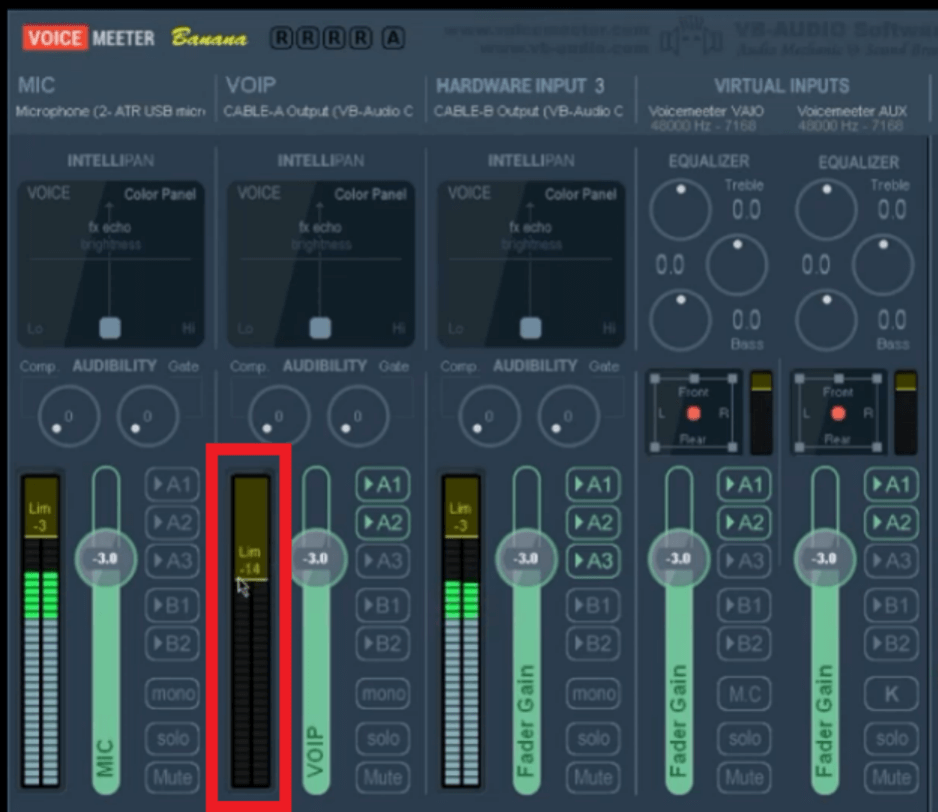
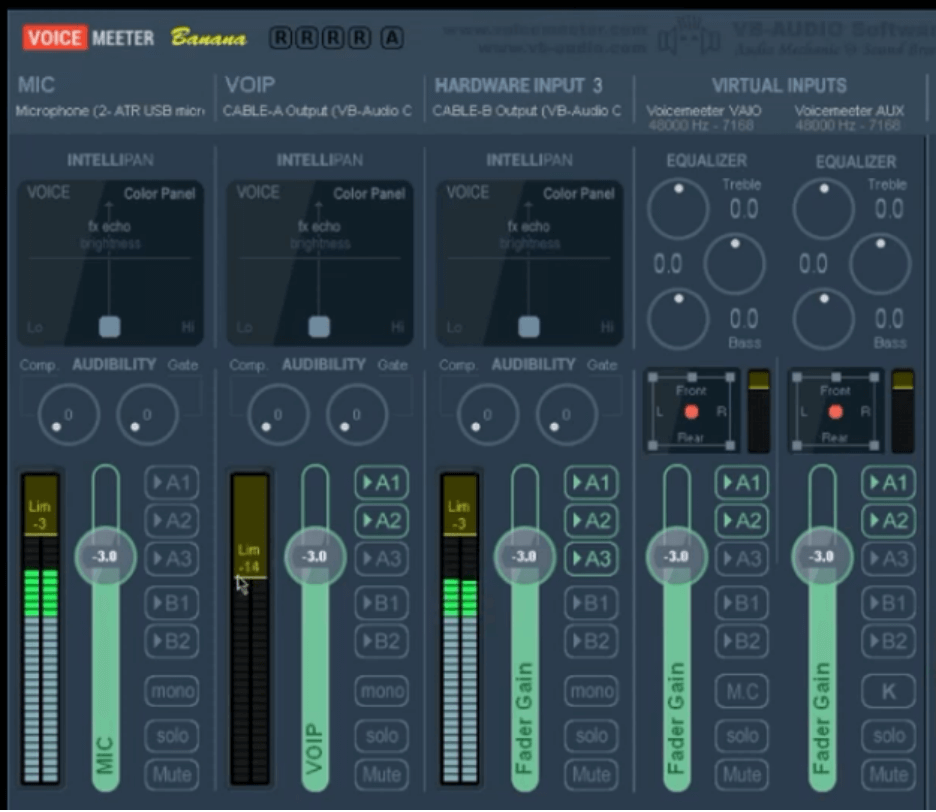
First way to set a noise limiter on Voicemeeter: By dragging input threshold
Step 1: Open Voicemeeter
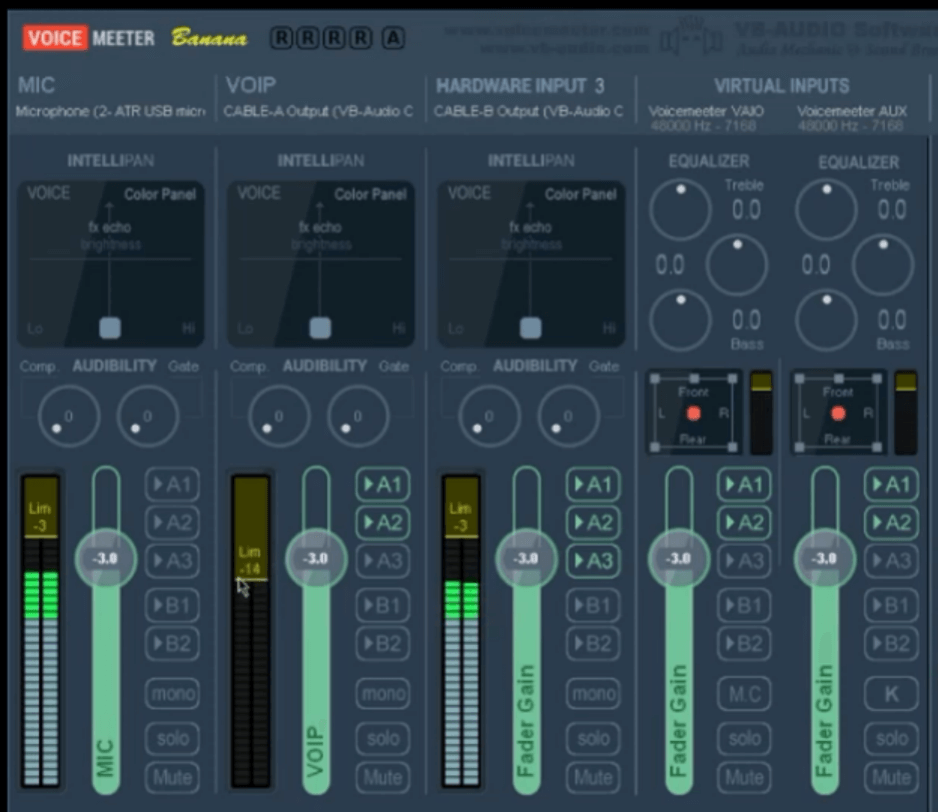
Step 2: Left-click on input threshold control and drag controls to tweak noise limiters
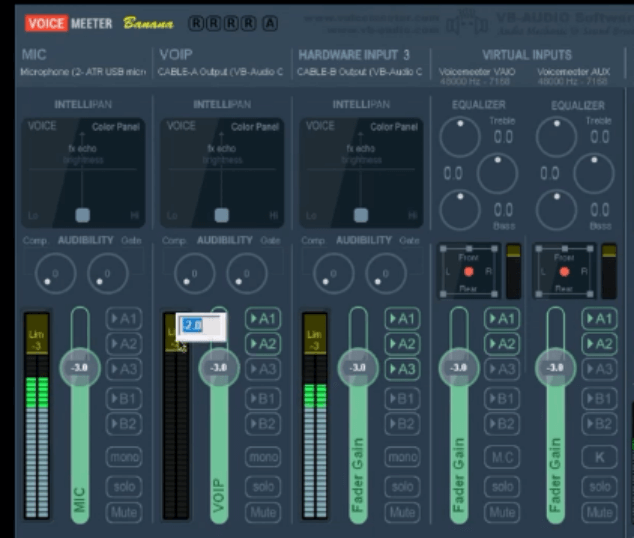
Second way to set a noise limiter on Voicemeeter: By entering threshold values
Step 1: Open Voicemeeter
Step 2: Right-click on input threshold and enter values directly
Should I Record with Noise Gate Voicemeeter?
Recording with a noise gate on Voicemeeter is essential if you plan to eliminate room noise and other background disturbances. The noise gate function from Voicemeeter eases clean, audible sound with zero interference from your environment.
How to Use Voicemeeter VST for Static Noise
Step 1: Open Minihost Modular
Step 2: Click on noise limiter plugin
Step 3: Set Mode to Subtract
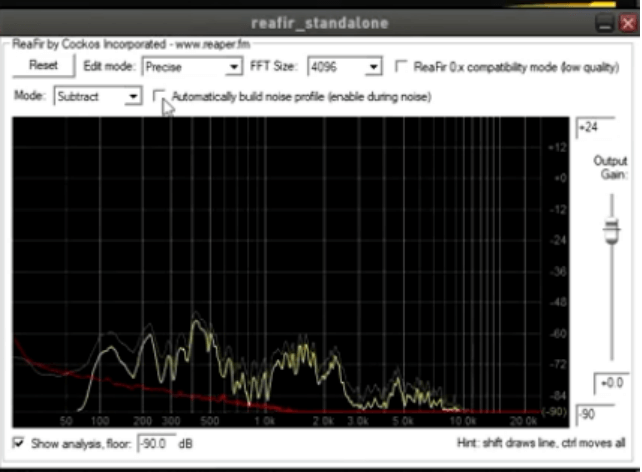
Step 4: Stay quiet and click on Automatically build noise profile (enable during noise)
Click the box on your installed limiter plugin that says ‘Automatically build noise profile (enable during noise)’. Stay quiet for about 10 – 20 seconds before unchecking the box.
What this function does is to set a limit where static noise filters out from your audio feed. Removing static noise from your audio feed gives off a clearer, more audible sound from receivers (speakers, airpods, etc.)