Streamlabs is an excellent streaming app with several handy features and straightforward settings. Streamers who choose Streamlabs could get much more from each streaming session with performance mode set to ON.
The Streamlabs Performance Mode is accessible from your preview screen after a couple of clicks. Activating Streamlabs Performance Mode makes it easy to improve the overall quality of streams and offline recordings.
Getting the best performance from your preferred streaming service is easier with correct settings. That’s why this article provides every relevant detail you need to maximize Streamlabs through every streaming/recording session.
Taking cues from this guide eases setting up your streams for crisp image quality and smoothly rendered overlays or animations.
Table of Contents
What Does Performance Mode Do in Streamlabs?
Performance Mode in Streamlabs allocate major system resources towards ensuring better image quality. Preview mode is not available on Streamlabs, but all animations from your sources onto streams will be rendered how you want.
Streamlabs edges out OBS with this setting, as recent versions of OBS Studio don’t support Performance Mode.
How to Enable Performance Mode in Streamlabs
Step 1: Open Streamlabs
Launch the Streamlabs application installed on your computer. You can download the Streamlabs app compatible with your system from streamlabs.com.
Step 2: Right-click on preview screen
Next, right-click your preview screen to reveal a list of options. Scroll to the bottom of all options available to locate performance mode.
Step 3: Select Performance Mode
Left-click on Performance Mode to get it activated on your stream. Activating this feature will remove preview screens from your Streamlabs home screen.
How to Improve Streamlabs Performance
First way to improve Streamlabs performance: By activating performance mode
Right-click the preview screen on Streamlabs to reveal a dropdown menu. Select Performance Mode from the dropdown menu to activate it.
Activating Performance Mode increases the quality of your streams by reducing general use of CPU resources by Streamlabs. The feature channels most available CPU resources towards your streams to make them better overall.
Second way to improve Streamlabs performance: Through the Settings menu
Go to the Settings menu and increase the FPS rating, output resolution, and select a high-performing encoder.
Note that increasing certain parameters on your Streamlabs settings will use up more CPU resources. Investing in a high-powered PC with massive system resources is essential to get more from your recording and streaming sessions.
How to Use Streamlabs without Losing FPS
Step 1: Reduce FPS rating and resolution of your game to negligible parameters
Launch your game and reduce its FPS ratings through the Settings menu. Consider reducing your game by at least 30FPS before launching OBS Game Capture.
Step 2: Open OBS
Launch the OBS app on your macOS, Linux, or Windows device. Next, check for recent updates to OBS and install any newer versions available.
Step 3: Go to Settings
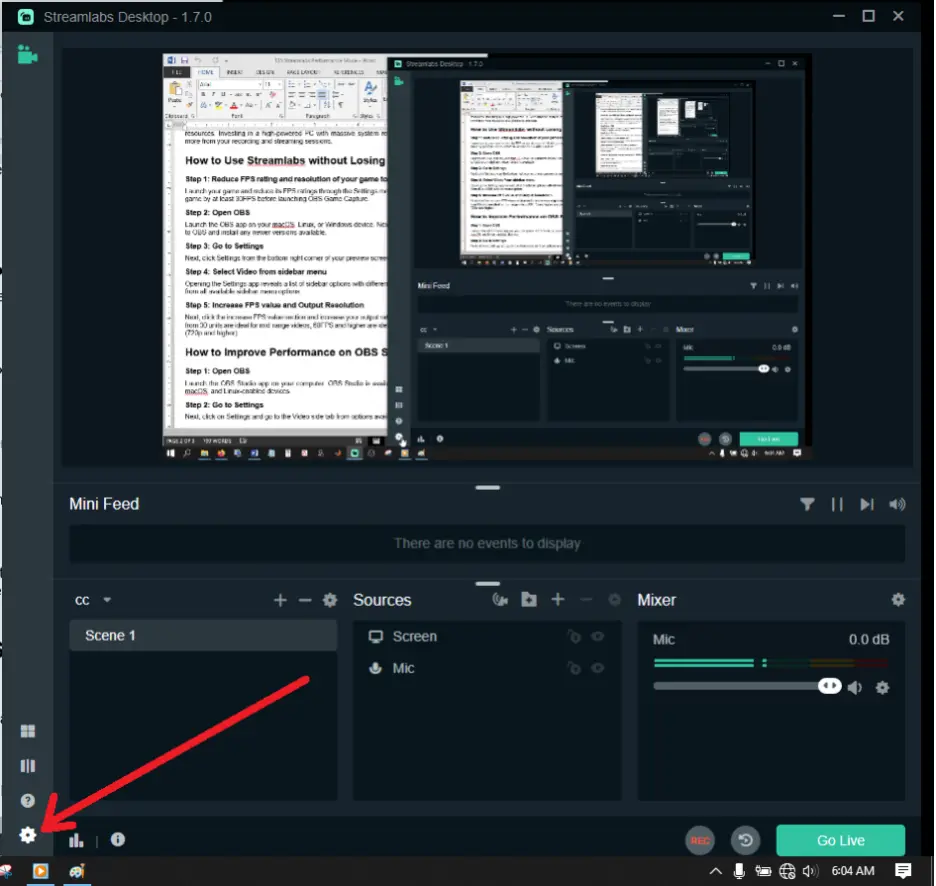
Next, click Settings from the bottom-left corner of your preview screen (the cog icon).
Step 4: Select Video from sidebar menu
Opening the Settings app reveals a list of sidebar options with different preferences. Select Video from all available sidebar menu options.
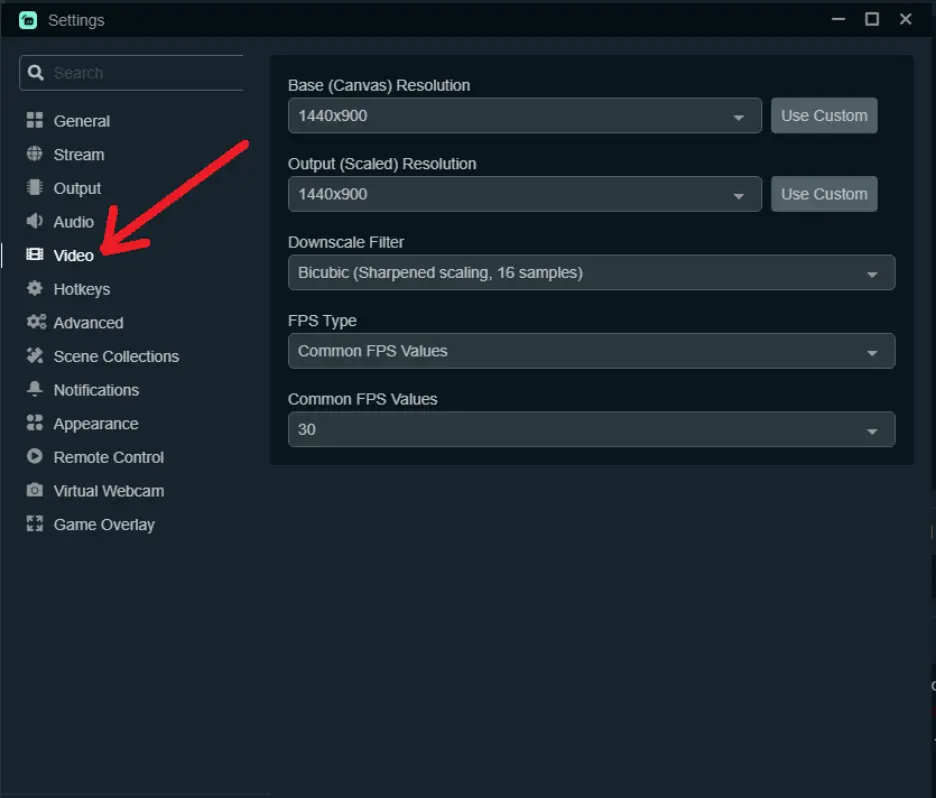
Step 5: Increase FPS value and Output Resolution
Next, click the increase FPS value section and increase your output rating by 30 units. FPS ratings from 30 units are ideal for mid-range videos, 60FPS and higher are ideal for high-resolution videos (720p and higher).
How to Improve Performance on OBS Studio
Step 1: Open OBS
Launch the OBS Studio app on your computer. OBS Studio is available on Windows 7or later, macOS, and Linux-enabled devices.
Step 2: Go to Settings
Next, click on Settings and go to the Video side tab from options available.
Step 3: Increase Video settings
FPS values, output/base resolution, and other parameters should be increased for better streaming quality.
Step 4: Increase Output settings and change encoders
Next, go to Output and change your encoding mode from Simple to Advanced. After that, switch encoders to your preferred option, click Apply, and then OK.
How to Use OBS with Less CPU Performance
Closing all unnecessary programs is the first step to ensuring your OBS runs with fewer CPU resources. After closing all unused programs, you can take one or all of these steps to use OBS with less CPU performance.
First way to use OBS with less CPU performance: By reducing stream parameters
Step 1: Open OBS
First, open OBS on your computer. Consider installing the latest version of OBS before attempting to reduce how much system resources OBS uses.
Step 2: Go to Settings
Next, go to Settings from the File menu or at the bottom-right corner of your screen.
Step 3: Go to Output
After that, click Output and reduce the audio and video bitrate of your streams. Next, click Apply and then OK to complete your setup.